

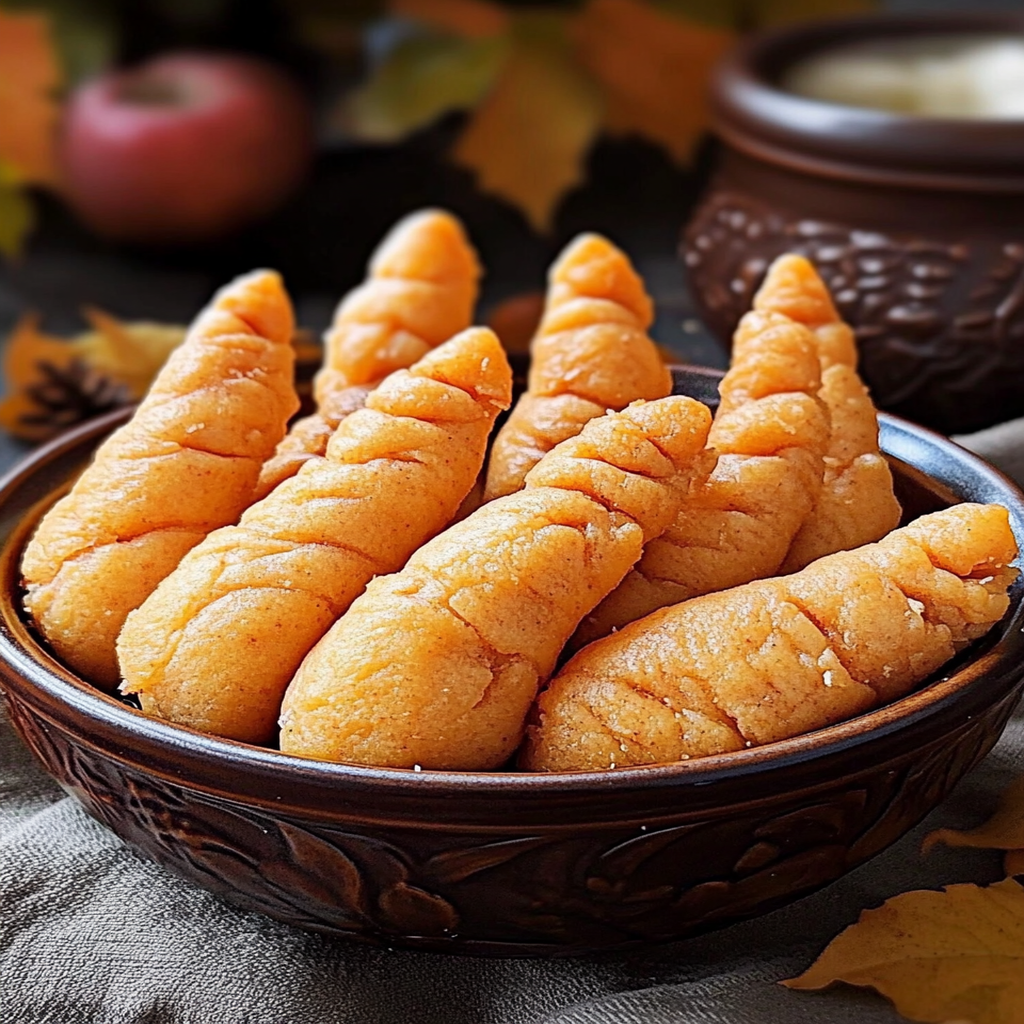
The crispy, golden Witch Fingers are more than just a snack; they’re a spine-tingling treat that makes your taste buds dance with delight. Picture this: you take a bite and the buttery exterior gives way to a savory filling that’s bursting with flavor, sending your senses into overdrive. Cranberry Brie Phyllo Cups It’s like Halloween in your mouth—without the spooky aftertaste.
I remember the first time I made Witch Fingers for a Halloween party. My friends were skeptical when I told them we’d be munching on “fingers,” but once they took that first bite, their eyes lit up like jack-o’-lanterns! We laughed, we crunched, and we devoured those creepy snacks faster than you can say “Boo!” Perfect for Halloween gatherings, movie nights, or any time you want to add a little fun to your food, these Witch Fingers are sure to impress.
Why You'll Love This Recipe
- This recipe offers easy preparation that even novice cooks can tackle.
- The flavor profile is a delightful mix of savory and buttery goodness.
- Visually, these spooky fingers are an eye-catching addition to any table.
- They’re versatile enough to serve as an appetizer, snack, or even a fun side dish at parties.
Ingredients for Witch Fingers
Here’s what you’ll need to make this delicious dish:
- Puff Pastry Sheets: Use store-bought puff pastry for convenience; it creates that flaky texture everyone loves.
- Ground Meat (Beef or Chicken): Choose your favorite ground meat for the filling; it adds heartiness to each finger.
- Shredded Cheese: Any melty cheese works well here; it enhances flavor and gives each finger a gooey surprise.
- Green Bell Peppers: Cut into strips and place them at the tips for fingernails—spooky yet delicious!
- Egg Wash: Mix one egg with water; this gives the pastry its beautiful golden color when baked.
- Salt and Pepper: Essential for seasoning the meat mixture; don’t skip this step for maximum flavor
How to Make Witch Fingers
Follow these simple steps to prepare this delicious dish:
Step 1: Preheat Your Oven
Preheat your oven to 375°F (190°C) and line a baking sheet with parchment paper. This ensures your Witch Fingers bake evenly and don’t stick.
Step 2: Prepare the Filling
In a skillet over medium heat, cook your ground meat until browned. Season it generously with salt and pepper. Once cooked through, drain excess fat if needed, and let it cool slightly.
Step 3: Roll Out Puff Pastry
While your filling cools, roll out the puff pastry sheets on a lightly floured surface. Cut them into rectangles about four inches wide—this is where our fingers come alive!
Step 4: Assemble Your Fingers
Place a spoonful of the meat mixture onto one end of each rectangle of pastry. Top it with some shredded cheese for that ooey-gooey goodness. Roll up the pastry tightly around the filling.
Step 5: Add Some Flair
Before sealing up each finger completely, position a green bell pepper strip at the tip as a fingernail. Seal the edges by pinching them together—this is where they become truly monstrous!
Step 6: Bake Until Golden
Transfer your assembled Witch Fingers onto the prepared baking sheet. Brush them with egg wash for that golden finish and pop them in the oven for about 20-25 minutes or until they’re puffed up and crispy.
Transfer to plates and serve warm for an eerie yet delightful snacking experience!
You Must Know
- Witch Fingers are not just a creepy Halloween treat; they can dazzle at any party!
- With their eerie appearance and delightful crunch, they’ll be the talk of the table.
- Easy to make and even easier to devour, these snacks will enchant your guests!
Perfecting the Cooking Process
Start by preheating your oven while you prepare the dough. Shape the Witch Fingers, then bake them until golden brown. As they cool, you can whip up your favorite dipping sauce for an extra kick.
Add Your Touch
Feeling adventurous? Swap almond slivers for pretzel sticks for a fun twist! You can also experiment with different seasonings in the dough or add food coloring for a more vibrant look.
Storing & Reheating
Store leftover Witch Fingers in an airtight container at room temperature for up to three days. To reheat, pop them in a toaster oven for a few minutes until crispy again.
Chef's Helpful Tips
- To achieve perfectly spooky Witch Fingers, roll the dough tightly around the almonds to avoid breakage.
- Use a light hand when shaping for a more realistic finger effect.
- Lastly, don’t skimp on the green food coloring; it adds that magical touch!
Sometimes, I make these Witch Fingers just to see my kids’ faces light up during Halloween. The joy of seeing them gobble them up is absolutely priceless!
FAQs :
What are Witch Fingers?
Witch Fingers are a fun and spooky treat often made around Halloween. These cookies resemble gnarled fingers, complete with almond “nails” for an eerie effect. They usually consist of a simple shortbread or cookie dough flavored with vanilla and can be shaped into elongated fingers. To enhance their frightful appearance, you can add food coloring or chocolate to create a more realistic look.
How do you make Witch Fingers?
To make Witch Fingers, start by creaming butter and sugar together until fluffy. Gradually mix in flour and vanilla extract to form a dough. Shape the dough into long, thin fingers, pressing almonds into one end for nails. Bake them until golden brown, and allow them to cool before serving. For an extra touch, you can drizzle melted chocolate over the fingertips to mimic blood.
Can I make Witch Fingers ahead of time?
Yes, you can prepare Witch Fingers ahead of time. After baking and cooling the cookies, store them in an airtight container at room temperature for up to a week. If you’re planning to serve them later, consider adding any chocolate or decorating touches just before serving to maintain their freshness and presentation.
Are there variations of Witch Fingers?
Absolutely! You can experiment with different flavors and ingredients when making Witch Fingers. Try adding almond extract for a nutty twist or incorporating food coloring into the dough for a vibrant look. You might also swap almonds for other nuts or candies to create different “nail” effects that suit your theme or taste preferences.
Conclusion for Witch Fingers :
In summary, Witch Fingers are an exciting treat perfect for Halloween festivities. Their unique appearance and delicious flavor make them a hit at parties and gatherings. With easy preparation steps and various options for customization, you can easily create these spooky cookies at home. Birthday Cake Oreo Cookies Rocky Road Cookies for Halloween Remember to have fun while making them, as they add a delightful touch to your celebrations! Nutella Pizza for a Sweet Treat.
Witch Fingers
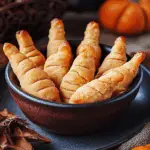
Witch Fingers are a thrilling Halloween treat that combines fun and flavor in every bite. These flaky puff pastry snacks, filled with savory ground meat and gooey cheese, are finished with spooky green bell pepper “nails” for a frightfully good presentation. Perfect for parties or family movie nights, these deliciously creepy snacks will have everyone coming back for more—just don’t forget to serve them warm!
- Prep Time: 20 minutes
- Cook Time: 25 minutes
- Total Time: 45 minutes
- Yield: Makes approximately 12 servings 1x
- Category: Appetizer
- Method: Baking
- Cuisine: American
Ingredients
- 1 package (17.3 oz) puff pastry sheets
- 1 lb ground beef or chicken
- 1 cup shredded cheddar or mozzarella cheese
- 1 cup green bell pepper strips (for nails)
- 1 egg (for egg wash)
- Salt and pepper to taste
Instructions
- Preheat your oven to 375°F (190°C) and line a baking sheet with parchment paper.
- In a skillet, cook the ground meat over medium heat until browned; season with salt and pepper.
- Roll out the puff pastry on a floured surface and cut into rectangles about 4 inches wide.
- Place a spoonful of filling on one end of each rectangle, top with cheese, and roll tightly.
- Add a green bell pepper strip at the tip of each rolled pastry as a fingernail, sealing edges by pinching.
- Brush each finger with egg wash and bake for 20-25 minutes until golden brown.
Nutrition
- Serving Size: 1 finger (approximately 60g)
- Calories: 210
- Sugar: 0g
- Sodium: 350mg
- Fat: 12g
- Saturated Fat: 5g
- Unsaturated Fat: 6g
- Trans Fat: 0g
- Carbohydrates: 15g
- Fiber: 1g
- Protein: 8g
- Cholesterol: 55mg
Leave a Comment