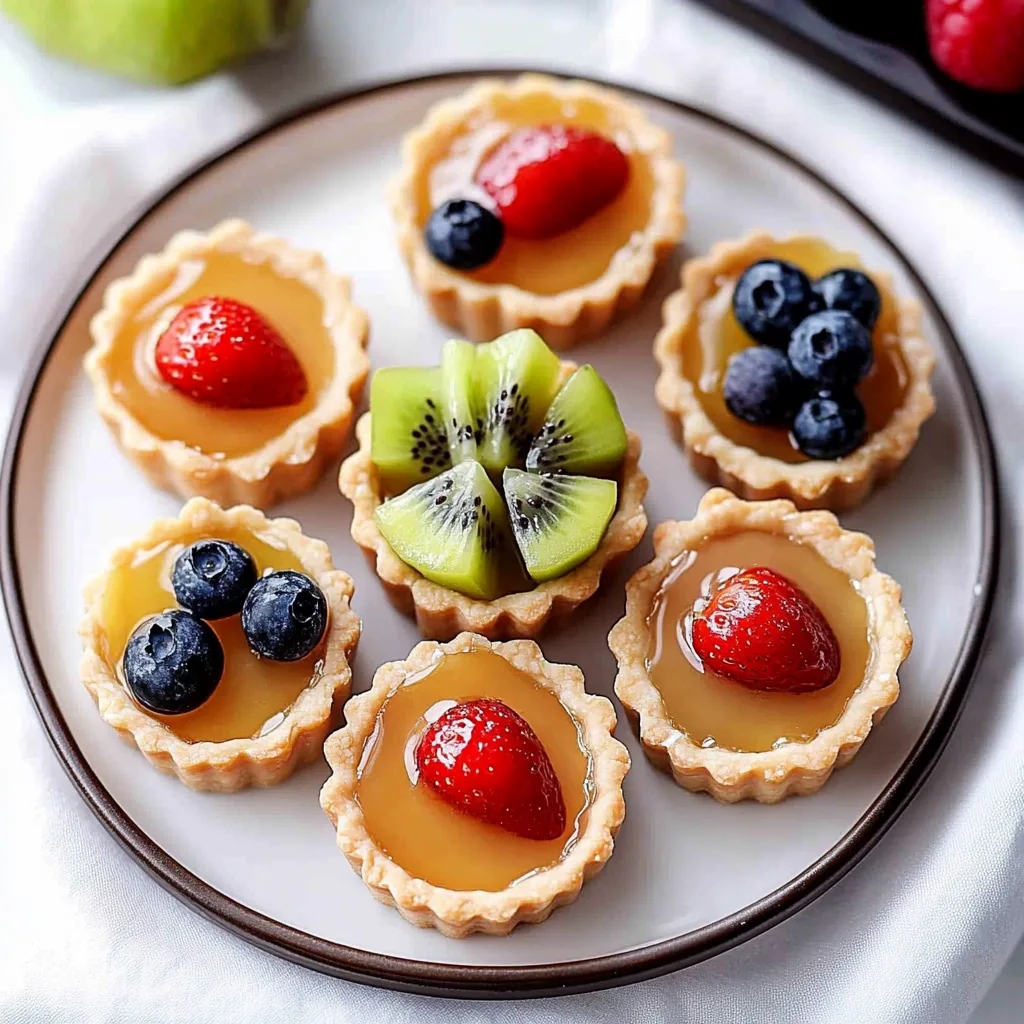
Imagine sinking your teeth into a delicate, buttery crust that crumbles at the slightest touch, giving way to a creamy filling topped with vibrant, juicy fruits bursting with sweetness. The symphony of flavors in these fruit tartlets dances on your palate, making every bite a celebration of summer’s bounty and an irresistible treat for any occasion.
As I recall my grandmother’s kitchen filled with laughter and the sweet aroma of baking, these fruit tartlets always stole the show at family gatherings, bringing smiles to faces young and old. Whether it’s a picnic in the park or an elegant dinner party, these delightful mini desserts promise to elevate any moment, leaving everyone craving just one more.
Why Does Everyone Love Fruit Tartlets?
Delightful mini fruit tartlets are a perfect blend of flavors and textures! Easy to make, they require just 30 minutes of prep and 15 minutes in the oven, making them an ideal choice for any occasion. Versatile and vibrant, you can customize the filling with your favorite seasonal fruits. Crowd-pleasing and visually stunning, these tartlets will impress guests at gatherings or simply satisfy your sweet cravings at home. Enjoy a delicious treat that’s as satisfying to make as it is to eat!
Fruit Tartlets Ingredients
For the Crust
- 1 cup all-purpose flour – This forms the base of your tartlets and provides a delicate, flaky texture.
- 1/2 cup butter (cold and cubed) – Cold butter ensures a tender crust; you can substitute with margarine if needed.
- 1/4 cup sugar – Adds sweetness to the crust, balancing the tartness of the filling.
- 1 large egg yolk – Helps bind the ingredients together while enriching the flavor.
For the Filling
- 1 cup cream cheese (softened) – Provides a rich and creamy base for your fruit tartlets; make sure it’s at room temperature for easy mixing.
- 1/4 cup sugar – Sweetens the cream cheese mixture, enhancing its flavor without overpowering the fruits.
- 1 teaspoon vanilla extract – Infuses a delightful aroma and depth of flavor to your filling.
- 2 cups mixed fresh fruits (such as berries and kiwi) – Fresh fruits add vibrant color and natural sweetness, making these Fruit Tartlets irresistible!
How to Make Fruit Tartlets
1. Combine In a mixing bowl, combine 1 cup all-purpose flour, 1/2 cup cold and cubed butter, and 1/4 cup sugar until the mixture resembles coarse crumbs. Then, add 1 large egg yolk and mix until the dough forms.
2. Press Press the dough into tartlet pans, ensuring an even layer across the bottom and sides. Chill in the refrigerator for 30 minutes to firm up the crust.
3. Preheat Preheat your oven to 350°F (175°C). This is key for achieving that perfect golden color! Bake the crusts for about 15 minutes or until they turn a lovely golden brown.
For the Filling:
4. Beat In a bowl, beat together 1 cup softened cream cheese, 1/4 cup sugar, and 1 teaspoon vanilla extract until smooth and creamy. This will be the delightful base of your Fruit Tartlets.
5. Fill Once the tartlet crusts have cooled completely, fill them generously with the cream cheese mixture. Make sure to leave a little space for those fresh fruits!
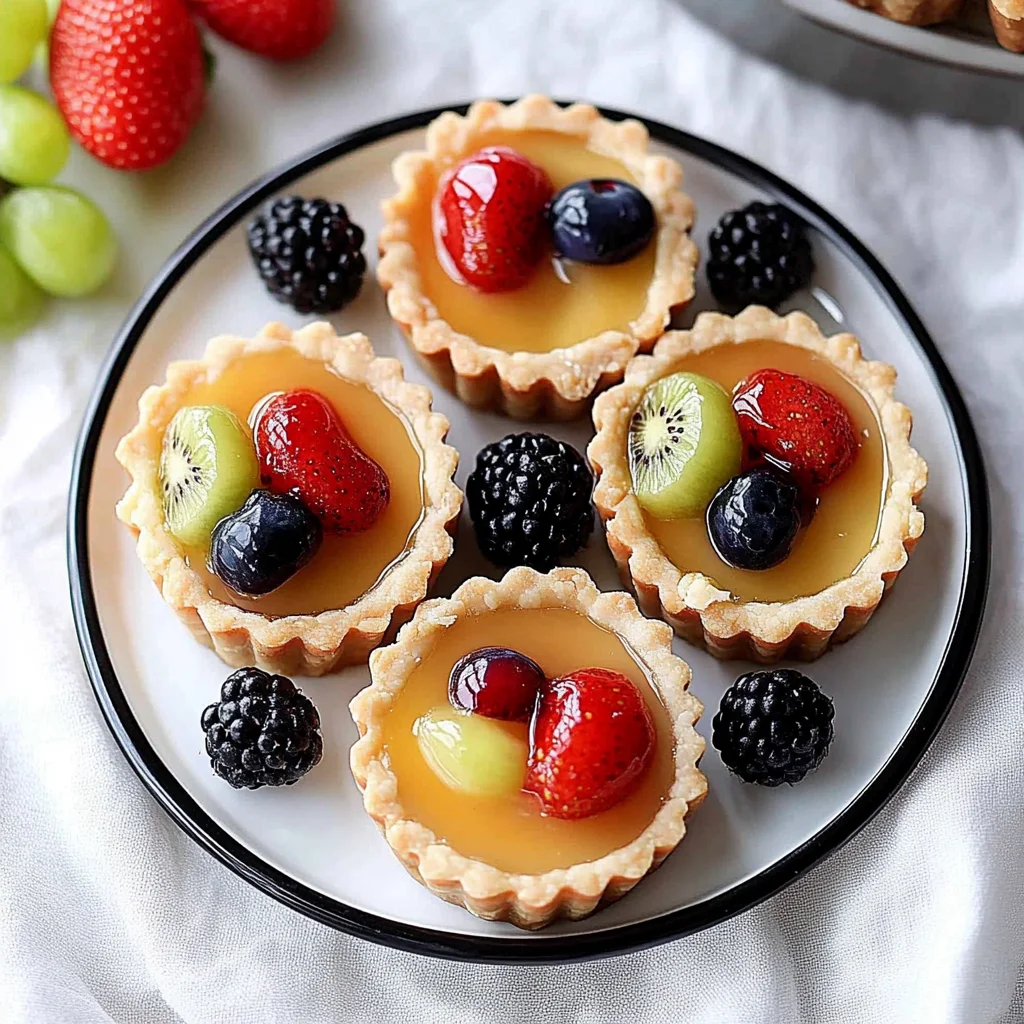
6. Top Finally, top each tartlet with 2 cups of mixed fresh fruits like berries and kiwi. Arrange them beautifully for a stunning finish that’s as delicious as it looks!
Optional: Garnish with a sprinkle of powdered sugar for an elegant touch!
Exact quantities are listed in the recipe card below.
Tips for the Best Fruit Tartlets
- Chill the Dough: Always chill the tartlet dough for 30 minutes; this helps prevent shrinkage during baking and ensures a flaky texture.
- Cold Ingredients: Use cold butter straight from the fridge when making your crust. This helps create that delightful, crumbly consistency you want in your mini tartlets.
- Don’t Overmix: When combining flour, butter, and sugar, mix just until crumbly. Overmixing can lead to tough crusts instead of tender ones.
- Check for Color: Bake until the crusts are golden brown. Undercooking can result in a soggy bottom while overbaking could dry them out.
- Fruit Freshness: Choose ripe, fresh fruits like berries and kiwi for vibrant flavors. Avoid overly soft or bruised fruits to maintain beautiful presentation on your tartlets.
- Smooth Filling: Ensure your cream cheese is fully softened before mixing; this prevents lumps in your filling and guarantees a silky-smooth taste in each Fruit Tartlet.
How to Store and Freeze Fruit Tartlets
- Room Temperature: Keep your fruit tartlets at room temperature for up to 2 hours if serving; they’re best enjoyed fresh!
- Fridge: Store uneaten tartlets in an airtight container in the fridge for up to 3 days. This keeps the crust crisp while preserving the creamy filling.
- Freezer: For longer storage, freeze unfilled tartlet shells for up to 1 month. Wrap them tightly in plastic wrap, then foil, to prevent freezer burn.
- Reheating: If you’ve frozen the shells, reheat them in a preheated oven at 350°F (175°C) for about 10 minutes before adding your filling and fruits. Enjoy those delicious fruit tartlets!
Fruit Tartlets Your Way
Feel free to let your creativity shine by customizing these delightful treats to suit your taste!
- Gluten-Free: Substitute all-purpose flour with a gluten-free blend for a deliciously inclusive crust. This swap allows everyone to enjoy the joy of fruit tartlets without worry.
- Vegan: Use coconut oil instead of butter and a flax egg (1 tbsp ground flaxseed + 2.5 tbsp water) as the binder. These adjustments create a rich, plant-based pastry that doesn’t skimp on flavor.
- Chocolate-Crusted: Replace some of the flour with cocoa powder for a chocolatey twist that pairs beautifully with fresh fruits. Imagine biting into a luscious, chocolate-infused tartlet!
- Nutty Crust: Incorporate almond or hazelnut flour into your mix for an added layer of flavor and texture. This nutty base enhances the overall experience with its delightful crunch.
- Citrus Zest: Add lemon or orange zest to the filling for a refreshing burst of citrus that complements the sweetness of the fruits perfectly. It’s like sunshine in every bite!
- Creamy Alternative: Swap cream cheese with mascarpone for a silkier filling that melts in your mouth. This variation elevates your tartlets to gourmet status.
- Spiced Filling: Mix in a pinch of cinnamon or nutmeg into the cream cheese mixture for an unexpected warmth that beautifully contrasts with the cool, fresh fruits.
- Savory Twist: Consider adding herbs like basil or mint to your fruit topping for a surprising savory kick. It transforms each mini tartlet into an exciting culinary adventure!
Make Ahead Options
Preparing these delightful Fruit Tartlets is a breeze, making them an excellent choice for meal prep! You can easily get a head start by making the crust up to 24 hours in advance. Simply combine 1 cup of all-purpose flour, 1/2 cup of cold cubed butter, and 1/4 cup of sugar until crumbly. Mix in one large egg yolk to form the dough, press it into tartlet pans, and chill them for at least 30 minutes before baking. The crusts can be baked and stored in an airtight container for up to three days. For the filling, you can whip together 1 cup of softened cream cheese, 1/4 cup of sugar, and 1 teaspoon of vanilla until smooth a day ahead. Just before serving, fill the cooled crusts with the cream cheese mixture and top with your prepped mixed fresh fruits like berries and kiwi to maintain their freshness. This way, you save time on busy days while still enjoying these vibrant Fruit Tartlets!
Fruit Tartlets Recipe FAQs
What type of flour is best for the crust?
All-purpose flour works beautifully for these fruit tartlets, giving a tender yet sturdy crust. If you’re looking for a gluten-free option, you can substitute with a gluten-free all-purpose blend, but ensure it contains xanthan gum to help bind the ingredients.
Can I use unsalted butter instead of salted butter for the crust?
Absolutely! Unsalted butter is actually recommended as it allows you to control the sweetness and saltiness of your tartlets better. Just remember to add a pinch of salt if you prefer that flavor contrast in your crust.
How should I store leftover fruit tartlets?
If you have any leftovers (which is rare because they’re so delightful!), store them covered in the refrigerator. They should keep well for about 2-3 days. Just know that the fresh fruits may start to release moisture, so it’s best to enjoy them within that timeframe for optimal freshness.
Can I freeze the unbaked tartlet shells?
Yes, you can freeze the unbaked tartlet shells! Shape them and place them on a baking sheet to freeze individually first, then transfer them into an airtight container or freezer bag. They’ll last up to 2 months. When you’re ready to bake, simply pop them straight from the freezer into the oven—add an extra minute or two to the baking time if needed.
What fruits work best for topping these tartlets?
While this recipe calls for mixed fresh fruits like berries and kiwi, feel free to get creative! Sliced peaches, mangoes, or even citrus segments can add a lovely twist. Just aim for fruits that are ripe and vibrant; they’ll enhance both the flavor and presentation of your tartlets.
What is the serving size for this fruit tartlet recipe?
This recipe yields four mini tartlets, making it perfect for a small gathering or family dessert night. Each serving comes in at around 200 calories, allowing you to indulge without too much guilt! Enjoy each bite—these little treasures are meant to be savored!
Ingredients
Method
- In a mixing bowl, combine flour, butter, and sugar until crumbly. Add egg yolk and mix until dough forms.
- Press the dough into tartlet pans and chill for 30 minutes.
- Preheat the oven to 350°F (175°C). Bake the crusts for 15 minutes or until golden.
- In a bowl, beat cream cheese, sugar, and vanilla until smooth.
- Fill the cooled tartlet crusts with the cream cheese mixture.
- Top with mixed fresh fruits.
Leave a Comment