

Walking Cherry Cheesecakes are like a delightful dance party for your taste buds, where smooth cream cheese meets vibrant cherries in a sweet embrace. Imagine biting into a mini cheesecake that feels like summer on your tongue—sweet, tangy, and oh-so-creamy. apple crumble cheesecake recipe These little wonders are perfect for any occasion, be it a picnic in the park or a cozy evening at home with friends.
Now picture this: you’re at a family gathering, and someone brings out these adorable Walking Cherry Cheesecakes. Everyone’s eyes light up as they realize dessert is not just served but also portable! The laughter that ensues is only rivaled by the delight of tasting this amazing treat. strawberry shortcake kabobs Trust me; once you make these, they will become your new go-to dessert for all occasions.
Why You'll Love This Recipe
- These Walking Cherry Cheesecakes require minimal effort yet deliver maximum flavor satisfaction.
- Their delightful cherry topping adds both sweetness and visual appeal, making them a feast for the eyes.
- They are versatile enough to be tailored to different tastes and occasions, making them an all-time favorite.
- Enjoy them chilled or at room temperature—either way, they remain utterly delicious!
Ingredients for Walking Cherry Cheesecakes
Here’s what you’ll need to make this delicious dish:
- Graham Cracker Crumbs: These form the crunchy base of your cheesecake. Choose finely crushed crumbs for an even texture.
- Unsalted Butter: Melted butter binds the crust together and adds richness to the flavor.
- Cream Cheese: Use full-fat cream cheese for the best creamy consistency; let it soften for easy mixing.
- Sugar: Granulated sugar sweetens the filling; adjust to your taste preference!
- Vanilla Extract: A splash of vanilla enhances the overall flavor profile—don’t skip it!
For the Topping:
- Fresh Cherries: Sweet and juicy cherries add a delightful burst of flavor; feel free to pit and slice them to your liking.
- Cherry Pie Filling: For an easier topping option, use store-bought cherry pie filling—deliciously convenient
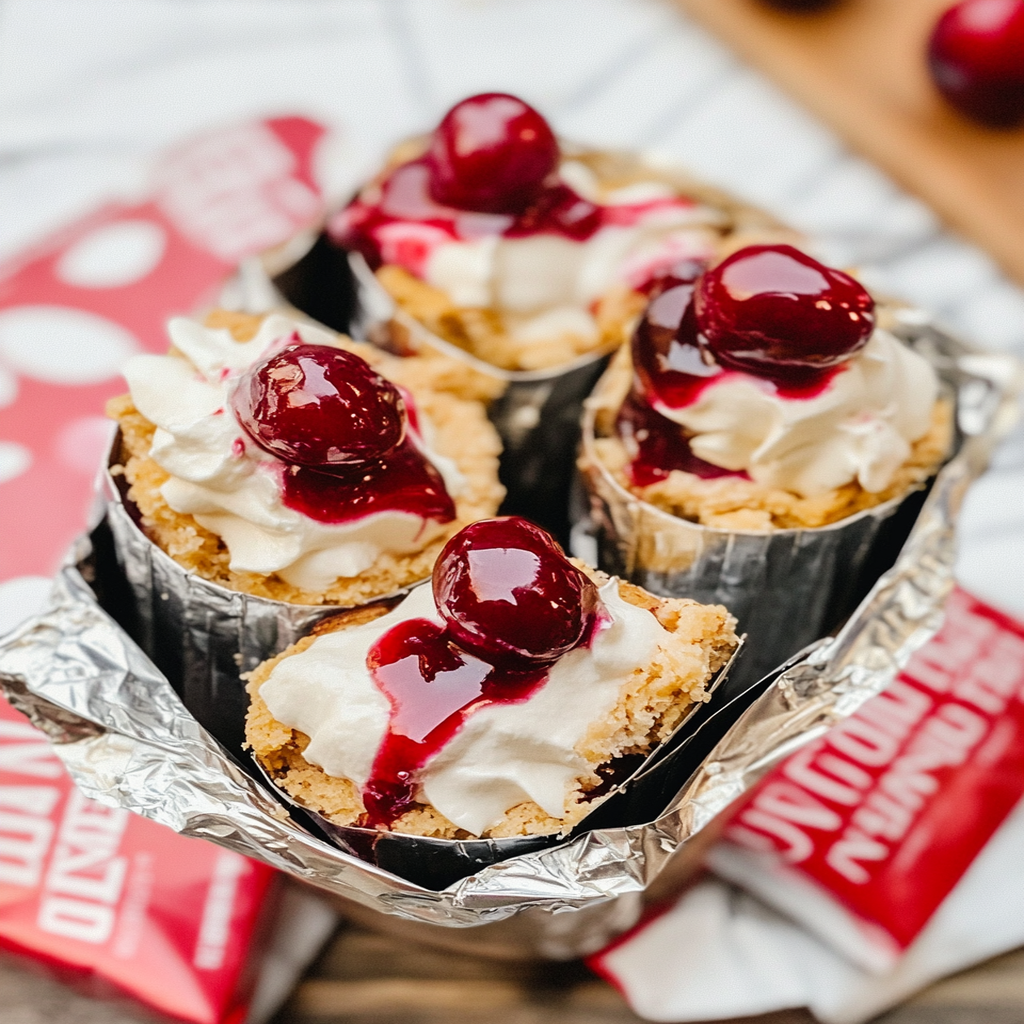
How to Make Walking Cherry Cheesecakes
Follow these simple steps to prepare this delicious dish:
Step 1: Prepare Your Crust
Start by preheating your oven to 350°F (175°C). In a medium bowl, mix graham cracker crumbs with melted butter until well combined. Press this mixture firmly into the bottom of small cups or jars. Bake for about 8 minutes until golden brown—your kitchen will smell heavenly!
Step 2: Mix Your Filling
In another bowl, beat softened cream cheese until smooth. Gradually add sugar and vanilla extract while mixing until it’s light and fluffy—think clouds of creamy goodness.
Step 3: Assemble Your Cheesecakes
Spoon the cream cheese filling into each cup on top of the cooled crusts—aim for about three-quarters full so there’s room for toppings later!
Step 4: Chill Out
Cover with plastic wrap and place in the refrigerator for at least two hours (or overnight if you’re feeling patient). This step is crucial because chilling helps set everything perfectly.
Step 5: Top with Cherries
Once chilled, spoon fresh cherries or cherry pie filling generously on top of each cheesecake cup. chocolate cherry pancakes recipe You can even get fancy and drizzle some chocolate sauce if you want to take it over-the-top!
Step 6: Serve and Enjoy
When ready to serve, present these beauties on a platter—and watch as everyone swoons! They can be enjoyed straight from their cups or enjoyed more formally with forks.
There you have it! Transfer to plates or serve directly from their cute little homes—these Walking Cherry Cheesecakes will surely steal hearts (and taste buds).
You Must Know
- Walking Cherry Cheesecakes are the perfect blend of sweet and creamy, all wrapped up in a delightful portable package.
- These little bites of heaven are not only fun to eat but also easy to make, making them a hit at any gathering.
Perfecting the Cooking Process
Start by preparing your cheesecake filling while the crust bakes to perfection. This efficient sequence saves time and ensures everything comes together smoothly for your Walking Cherry Cheesecakes.
Add Your Touch
Customize your Walking Cherry Cheesecakes with different fruit toppings like strawberries or blueberries. You can also swap out the crust for a gluten-free alternative or add spices like cinnamon for an exciting twist.
Storing & Reheating
Store your Walking Cherry Cheesecakes in an airtight container in the fridge for up to three days. For serving, simply let them sit at room temperature for about 15 minutes before indulging.
Chef's Helpful Tips
- For perfect Walking Cherry Cheesecakes, ensure your cream cheese is at room temperature for smooth blending.
- Avoid over-mixing to keep the texture light and fluffy.
- And don’t skimp on chilling time; it makes all the difference!
Sometimes, I make these for family gatherings, and you wouldn’t believe how fast they disappear! Everyone raves about them, asking for seconds—it’s truly a proud moment when my creations are so well-loved!
FAQs :
What are Walking Cherry Cheesecakes?
Walking Cherry Cheesecakes are a fun and portable dessert option that combines the creamy texture of cheesecake with the vibrant flavor of cherries. Typically served in small cups or jars, these treats are perfect for picnics, parties, or any on-the-go occasion. swirled chocolate cupcakes The cherry topping adds a refreshing burst of sweetness that pairs beautifully with the rich cheesecake filling.
How do I make the crust for Walking Cherry Cheesecakes?
To make the crust for Walking Cherry Cheesecakes, you can use crushed graham crackers mixed with melted butter and a bit of sugar. Press this mixture into the bottom of your serving cups to create a sturdy base. You can also experiment with alternatives like crushed cookies or gluten-free options if desired. Allow the crust to set in the refrigerator for best results.
Can I use different fruits for Walking Cherry Cheesecakes?
Absolutely! While cherries are a fantastic choice, you can easily substitute them with other fruits such as strawberries, blueberries, or raspberries. Just prepare a fruit topping using fresh or canned fruits, and adjust the sweetness according to your taste. This flexibility allows you to customize your Walking Cherry Cheesecakes based on seasonal ingredients or personal preferences.
How long do Walking Cherry Cheesecakes last?
When stored properly in an airtight container in the refrigerator, Walking Cherry Cheesecakes can last up to three days. However, for optimal flavor and texture, it’s best to enjoy them within the first couple of days after preparation. If you’re making them ahead of time, consider adding the fruit topping just before serving to prevent sogginess.
Conclusion for Walking Cherry Cheesecakes :
Walking Cherry Cheesecakes offer a delightful blend of convenience and flavor, making them an ideal treat for any occasion. With a simple crust made from crushed graham crackers and a creamy cheesecake filling topped with sweet cherries, they are sure to impress your guests. Feel free to experiment with different fruits and presentations to make them your own. Enjoy these tasty desserts fresh for the best experience!
Walking Cherry Cheesecakes

Walking Cherry Cheesecakes are a delightful, portable dessert that brings together the creamy richness of cheesecake and the sweet burst of cherries. Perfect for any gathering, these mini treats are as visually appealing as they are delicious. Whether enjoyed at a picnic or served at a family gathering, they promise to be a hit with guests of all ages.
- Prep Time: 15 minutes
- Cook Time: 8 minutes
- Total Time: 23 minutes
- Yield: Serves approximately 6 cheesecake cups 1x
- Category: Dessert
- Method: Baking
- Cuisine: American
Ingredients
- 1 cup graham cracker crumbs
- 4 tbsp unsalted butter, melted
- 8 oz cream cheese, softened
- 1/2 cup granulated sugar
- 1 tsp vanilla extract
- 1 cup fresh cherries, pitted and halved (or 1 can cherry pie filling)
Instructions
- Preheat the oven to 350°F (175°C). Mix graham cracker crumbs with melted butter until combined. Press firmly into small cups and bake for 8 minutes until golden brown. Let cool.
- In a separate bowl, beat softened cream cheese until smooth. Gradually add sugar and vanilla, mixing until fluffy.
- Fill each cup with cream cheese mixture, leaving space for toppings. Chill in the fridge for at least 2 hours.
- Top with fresh cherries or cherry pie filling before serving.
Nutrition
- Serving Size: 1 cheesecake cup (90g)
- Calories: 270
- Sugar: 20g
- Sodium: 180mg
- Fat: 15g
- Saturated Fat: 9g
- Unsaturated Fat: 5g
- Trans Fat: 0g
- Carbohydrates: 29g
- Fiber: 1g
- Protein: 4g
- Cholesterol: 45mg
Leave a Comment