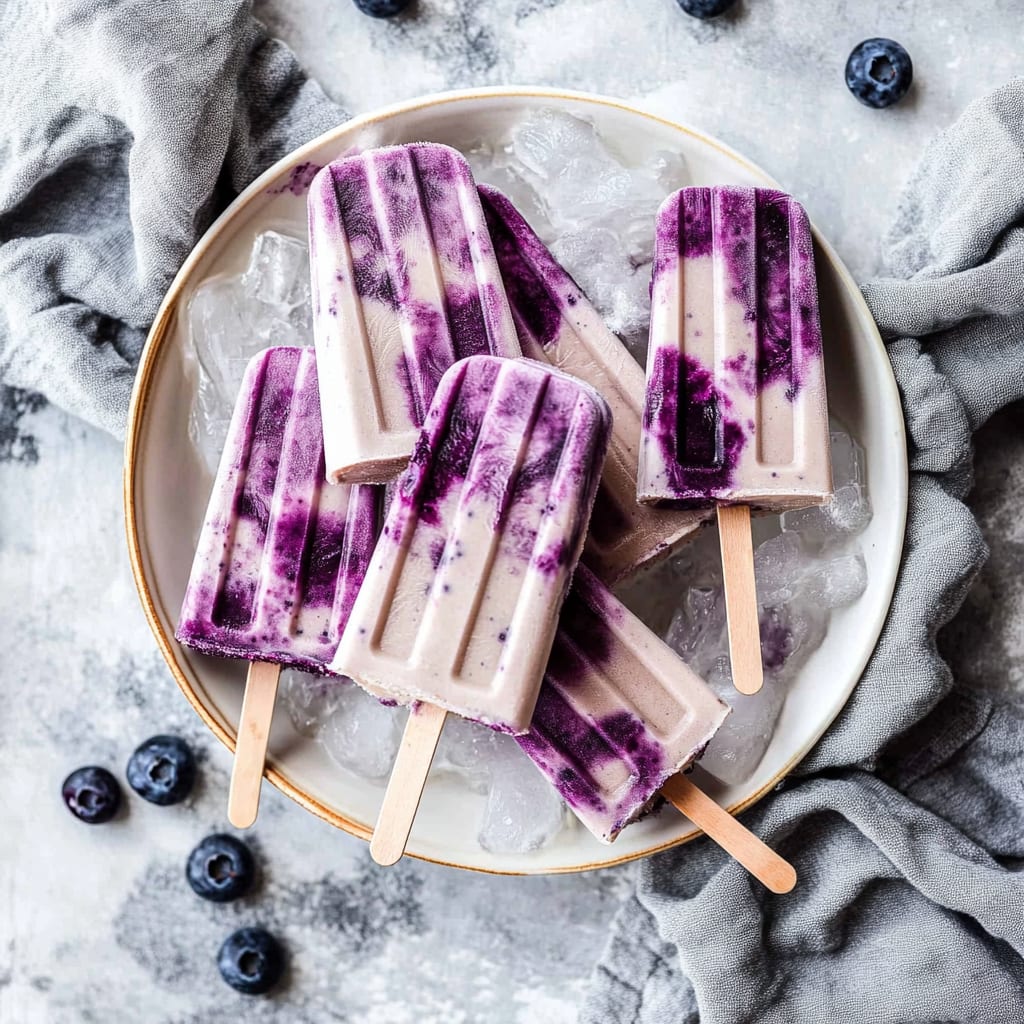
Imagine sinking your teeth into a Blueberry London Fog Popsicle, where the creamy texture meets the delightful sweetness of ripe blueberries, all wrapped up in the warm, aromatic embrace of Earl Grey tea. Each bite is like a mini-vacation for your taste buds, transporting you to a sunny afternoon in a cozy café, where every sip of tea feels like a hug from an old friend.
These popsicles are not just a treat; they are the perfect companion for lazy summer days or as a whimsical dessert at your next gathering. I can still remember the first time I made them—my kitchen turned into a delightful chaos of blueberry juice and laughter as I tried to keep my little ones from sneaking spoonfuls before they even froze. Get ready to indulge in this refreshing flavor experience that promises to leave you both satisfied and smiling!
Why Is Blueberry London Fog Popsicles So Irresistibly Good?
Refreshing and creamy, these popsicles combine the unique flavors of Earl Grey tea with sweet, juicy blueberries. Easy to make, with just 15 minutes of prep time, they fit perfectly into any busy lifestyle. Versatile enough for a summer treat or a chic dessert, they’re sure to impress friends and family alike. Health-conscious? Use a dairy-free alternative and adjust the sweetness to your taste!
Blueberry London Fog Popsicles Ingredients
- For the Popsicle Base
- 1 cup blueberries (fresh or frozen) – These sweet and tangy berries add a burst of flavor and vibrant color to your popsicles.
- 1 cup milk (or dairy-free alternative) – Use whole milk for creaminess or almond/coconut milk for a lighter, dairy-free option.
- 1 cup strong brewed Earl Grey tea (cooled) – The aromatic notes of bergamot in the tea give these popsicles their signature London Fog flavor.
- 2 tablespoons honey (or sweetener of choice) – Honey complements the fruity and floral flavors beautifully; adjust sweetness to your liking for the Blueberry London Fog Popsicles.
How to Make Blueberry London Fog Popsicles
1. Blend the blueberries, milk, brewed tea, and honey until smooth. This creamy mixture will take just a few moments—aim for a lovely purple hue that’s both inviting and refreshing.
2. Pour the mixture into popsicle molds. Fill each mold generously, ensuring there’s enough room for expansion as they freeze into delightful treats.
3. Insert sticks and freeze for at least 4 hours or until solid. Patience is key here; allow them to freeze completely for that satisfying bite.
4. Serve: run the molds under warm water for a few seconds to release the popsicles. This little trick helps them slide out effortlessly, ready for your enjoyment!
Optional: Garnish with fresh blueberries for an extra touch of elegance!
Exact quantities are listed in the recipe card below.
Expert Tips
- Berry Selection: Use ripe blueberries for the best flavor. If using frozen, let them thaw slightly for easier blending.
- Tea Strength: Make sure your Earl Grey tea is strong enough by using two tea bags or steeping longer; this enhances the popsicle’s flavor.
- Sweetness Adjustment: Taste your mixture before pouring into molds. You can always add more honey if you prefer a sweeter Blueberry London Fog Popsicle.
- Mold Prep: Lightly grease your popsicle molds with cooking spray to help release the popsicles effortlessly once frozen.
- Freezing Time: Don’t rush it! Ensure popsicles freeze completely for at least 4 hours to achieve that perfect creamy texture.
How to Store Blueberry London Fog Popsicles the Right Way
- Freezer: Store your Blueberry London Fog Popsicles in an airtight container or freezer bag for up to 2 months. This keeps them fresh and ready for a delicious treat anytime!
- Fridge: If you have leftover popsicle mixture, it can be stored in the fridge for up to 3 days in a sealed container. Just give it a good stir before refilling your molds.
- Serving Suggestion: To enjoy the popsicles at their best, let them sit at room temperature for a couple of minutes before removing from the mold. This makes it easier to pop them out!
Blueberry London Fog Popsicles Variations
Feel free to get creative and personalize these delightful treats with your favorite ingredients or dietary needs!
- Dairy-Free: Substitute the milk with almond, coconut, or oat milk for a creamy, plant-based option. Each alternative brings its unique flavor, enhancing the overall experience.
- Sweetness Level: Adjust the honey amount to suit your taste—use less for a tart treat or more for extra sweetness. A touch of maple syrup can also add a lovely depth.
- Berry Blend: Swap blueberries for raspberries or blackberries to create a different fruity profile. The vibrant colors and flavors will make each popsicle uniquely delicious.
- Citrus Zest: Add a teaspoon of lemon or orange zest to the mixture for a refreshing twist. This brightens the flavor and adds an aromatic touch that is simply irresistible.
- Herbal Infusion: Experiment with different teas like chamomile or lavender to vary the base flavor. Each herbal note transforms the popsicles into an entirely new experience.
- Nutty Crunch: Incorporate chopped nuts such as almonds or pistachios for added texture. They offer a delightful crunch that contrasts beautifully with the creamy popsicle base.
- Spicy Kick: Introduce a pinch of cinnamon or cardamom for warmth and depth. These spices elevate the flavor profile, making each bite feel cozy and indulgent.
- Chocolate Drizzle: Dip the finished popsicles in melted dark chocolate before freezing for an indulgent treat. The chocolate shell adds a decadent finish that’s hard to resist!
Make Ahead Options
Preparing Blueberry London Fog Popsicles is a breeze, making them an ideal choice for meal prep! You can easily prep the popsicle base by blending together 1 cup of blueberries (fresh or frozen), 1 cup of milk (or a dairy-free alternative), 1 cup of cooled, strong brewed Earl Grey tea, and 2 tablespoons of honey. This mixture can be prepared up to 24 hours in advance and stored in the refrigerator until you’re ready to pour it into popsicle molds. Once you blend the ingredients, simply pour them into molds, insert sticks, and freeze for at least 4 hours or until solid. To serve, just run the molds under warm water for a few seconds to release the popsicles. This way, you can enjoy refreshing Blueberry London Fog Popsicles whenever you desire without any last-minute fuss!
Blueberry London Fog Popsicles Recipe FAQs
Can I use frozen blueberries instead of fresh ones?
Absolutely! Frozen blueberries work just as well as fresh ones in this recipe. They add a lovely sweetness and vibrant color, just like their fresh counterparts. Plus, using frozen blueberries can save you some prep time!
What type of milk can I use for these popsicles?
You can use any milk you prefer! This includes cow’s milk, almond milk, coconut milk, or oat milk. Each will lend a slightly different flavor, but all will create a creamy base for your popsicles. If you’re aiming for a dairy-free version, go ahead with your favorite alternative!
How long do these popsicles last in the freezer?
These blueberry London Fog popsicles can be stored in the freezer for up to 2 months. Just make sure they are sealed tightly in an airtight container or wrapped well to prevent freezer burn. When you’re ready to enjoy them, simply run the molds under warm water for a few seconds to release them effortlessly.
What should I do if my popsicles are hard to remove from the molds?
If you find that your popsicles are tough to get out of the molds, running warm water over the outside of the molds for about 10-15 seconds usually does the trick! You can also try twisting gently while pulling on the stick. Just be careful not to pull too hard; patience is key!
How many servings does this recipe yield?
This delightful recipe makes about 4 servings, perfect for sharing with family or enjoying during a hot summer day. Each popsicle is only 80 calories, making them a guilt-free treat!
Can I sweeten these popsicles with something other than honey?
Certainly! If honey isn’t your preferred sweetener, feel free to substitute it with maple syrup, agave nectar, or any other sweetener that fits your dietary needs. Just remember to adjust the amount to taste – start with 2 tablespoons and add more if desired!
Leave a Comment