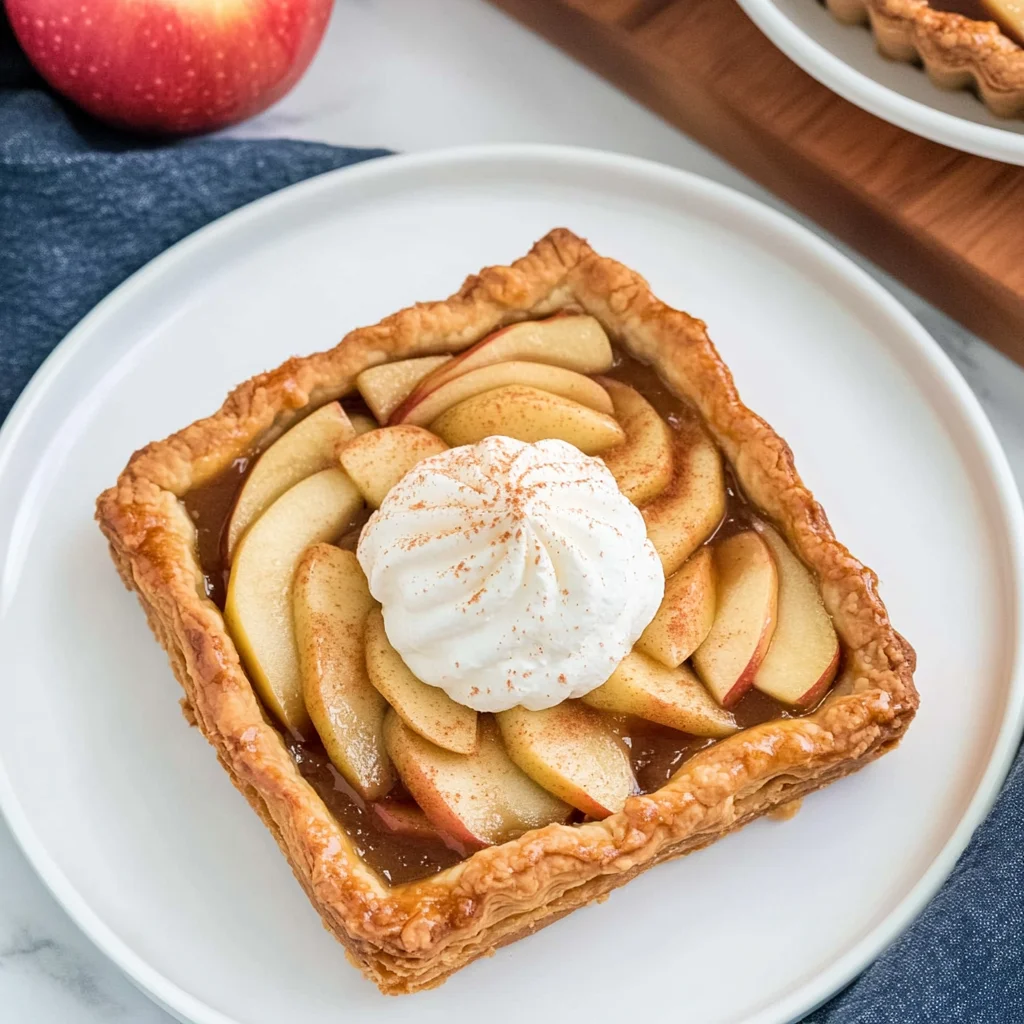
Imagine sinking your fork into a warm, homemade apple tart, where the sweet aroma of baked apples mingles with cinnamon and buttery crust, instantly transporting you to a cozy kitchen on a crisp autumn day. Each bite reveals a delightful contrast of textures—the tender, juicy apples nestled in a flaky, golden shell—creating an irresistible harmony that tantalizes the taste buds and warms the heart.
This delicious apple tart isn’t just a dessert; it’s a memory wrapped in pastry, reminiscent of family gatherings where laughter filled the air and everyone eagerly anticipated that first slice. Whether it’s served at Thanksgiving dinner or enjoyed as an afternoon treat with coffee, this classic recipe promises not only to satisfy your sweet tooth but also to evoke cherished moments that make sharing food so special.
Why Will You Keep Making Apple Tart?
Deliciously simple to prepare, this Apple Tart brings together fresh, juicy apples and a flaky crust that just melts in your mouth. Perfect balance of sweet and tart flavors with hints of cinnamon elevate your dessert game. Quick to whip up in just 30 minutes prep time, it’s ideal for unexpected guests or cozy family dinners. Versatile enough to be served warm with vanilla ice cream or enjoyed cold as an afternoon treat. Crowd-pleasing favorite, guaranteed to impress everyone at the table!
Apple Tart Ingredients
For the Crust
- 1 cup all-purpose flour – This forms the base of your tart, creating a tender and flaky crust.
- 1/2 cup unsalted butter (cold and cubed) – Using cold butter ensures a flaky texture; don’t forget to chill it!
- 1/4 cup granulated sugar – This adds sweetness to the crust, balancing the tartness of the apples.
- 1 pinch salt – A touch of salt enhances all the flavors in your Apple Tart beautifully.
- 2-3 tablespoons ice water – Adding ice water helps bind the dough without melting the butter.
For the Filling
- 4 cups sliced apples (peeled and cored) – Choose firm apples like Granny Smith for a perfect balance of sweetness and tartness.
- 1/2 cup brown sugar – This adds a rich, caramel flavor that complements the fresh apples perfectly.
- 1 teaspoon cinnamon – Cinnamon brings warmth and depth, making your Apple Tart even more inviting.
- 1 tablespoon lemon juice – A splash of lemon juice brightens up the flavors and prevents browning in the apples.
Step-by-Step Apple Tart
1. Combine Ingredients: In a mixing bowl, combine 1 cup all-purpose flour, 1/2 cup cold and cubed unsalted butter, 1/4 cup granulated sugar, and a pinch of salt. Mix until the mixture is crumbly and resembles coarse sand.
2. Form the Dough: Gradually add 2-3 tablespoons of ice water to the flour mixture until the dough comes together. Shape it into a disk, wrap it in plastic, and refrigerate for 30 minutes to firm up.
For the Filling:
3. Toss Apples: In another bowl, toss 4 cups of sliced apples (peeled and cored) with 1/2 cup brown sugar, 1 teaspoon cinnamon, and 1 tablespoon lemon juice. Ensure every slice is coated with the sweet mixture for that perfect flavor.
Assemble and Bake:
4. Preheat Oven: Preheat your oven to 375°F (190°C). Roll out the chilled dough on a floured surface until it’s about 1/8 inch thick. Fit it snugly into a pie dish for that lovely flaky crust.
5. Fill Tart: Spoon the apple mixture evenly into the prepared crust. Bake in the preheated oven for about 45 minutes or until the apples are tender and the crust is golden brown.
Optional: Serve warm with a scoop of vanilla ice cream for an extra treat!
Exact quantities are listed in the recipe card below.
Secrets to Perfect Apple Tart
- Chill the Butter: Make sure your butter is very cold before mixing. This helps create a flaky crust that melts in your mouth.
- Don’t Overmix: When combining the flour and butter, mix just until crumbly. Overmixing can lead to a tough crust.
- Right Dough Consistency: Add ice water gradually until the dough holds together. Too much water can make it sticky; too little leaves it dry.
- Apple Variety Matters: Use a mix of sweet and tart apples for depth of flavor. Granny Smith and Honeycrisp are great choices!
- Even Slices: Slice apples evenly for uniform cooking. Uneven slices can result in some apples being mushy while others remain crunchy.
- Cool Before Serving: Allow the apple tart to cool slightly before slicing. This helps the filling set, making for cleaner, more beautiful slices.
How to Store and Freeze Apple Tart

- Room Temperature: Keep your Apple Tart covered at room temperature for up to 2 days. This helps maintain its flaky crust and fresh flavor.
- Fridge: Store any leftover Apple Tart in the refrigerator for up to 5 days, wrapped tightly in plastic wrap or in an airtight container to prevent drying.
- Freezer: For longer storage, freeze the Apple Tart for up to 3 months. Wrap it well in plastic wrap followed by aluminum foil to avoid freezer burn.
- Reheating: To enjoy your tart warm, preheat the oven to 350°F (175°C) and heat for about 10-15 minutes until warmed through.
Apple Tart Your Way
Feel free to let your creativity shine as you customize this timeless dessert to suit your taste!
- Whole Wheat: Substitute all-purpose flour with whole wheat flour for a nuttier flavor and added health benefits. This change not only gives the crust a delightful texture but also makes it a bit heartier, perfect for those who enjoy a more rustic touch.
- Vegan: Replace unsalted butter with coconut oil or vegan butter, and use flaxseed meal mixed with water as an egg substitute. Your tart will retain its flaky quality while being completely plant-based, allowing everyone to indulge in this sweet treat.
- Nutty Addition: Mix in 1/4 cup of finely chopped walnuts or pecans into the crust for an extra crunch. The nuts add depth and a lovely surprise that complements the apple filling perfectly, making every slice even more enjoyable.
- Brown Sugar Twist: Use maple syrup instead of brown sugar in the filling for a unique twist. This swap infuses the tart with a rich, deep flavor that elevates the sweetness and pairs beautifully with the cinnamon-spiced apples.
- Spice It Up: Add 1/2 teaspoon of nutmeg or ginger to the filling for an aromatic kick. These spices introduce warmth and complexity to each bite, creating a cozy dessert that feels like home.
- Add Citrus Zest: Incorporate zest from one orange or lemon into the filling for a fresh burst of flavor. This bright addition enhances the overall taste profile, balancing the sweetness of the apples and bringing vibrancy to your dessert.
- Caramel Drizzle: Top your finished tart with homemade or store-bought caramel sauce before serving. The luscious drizzle adds an indulgent finish that transforms each slice into a decadent experience, perfect for special occasions!
Make-Ahead Tips for Apple Tart
Preparing this delightful Apple Tart is not only a joy but also perfect for meal prep, allowing you to savor its flavors without the last-minute rush. You can make the crust by combining 1 cup of all-purpose flour, 1/2 cup of cold, cubed unsalted butter, 1/4 cup of granulated sugar, and a pinch of salt until crumbly. Add in 2-3 tablespoons of ice water to bring it together into a disk, which can be refrigerated for up to 3 days. For the filling, toss your 4 cups of sliced apples with 1/2 cup of brown sugar, 1 teaspoon of cinnamon, and 1 tablespoon of lemon juice; this mixture can sit in the fridge for a day before use. When you’re ready to serve, simply roll out the dough, assemble your tart by filling it with the apple mixture, and bake at 375°F (190°C) for about 45 minutes or until those apples are perfectly tender. This way, you’ll maintain the quality and enjoy a freshly baked dessert that brings warmth to every gathering.
Apple Tart Recipe FAQs
What type of apples work best for an apple tart?
For an apple tart, I recommend using a mix of tart and sweet apples. Varieties like Granny Smith, Honeycrisp, and Fuji are fantastic choices. Granny Smith adds a lovely tang, while Honeycrisp and Fuji contribute sweetness and juiciness. Aim for about four cups of sliced apples to ensure a flavorful filling!
How should I store leftover apple tart?
If you have any leftovers (which is rare!), store your apple tart in an airtight container at room temperature for up to two days. For longer storage, refrigerate it for up to five days. Just be sure to let it come to room temperature before serving again to enjoy that delightful flaky crust!
Can I freeze the apple tart?
Absolutely! To freeze your apple tart, wrap it tightly in plastic wrap and then in aluminum foil. It can be stored in the freezer for up to three months. When you’re ready to enjoy it, thaw it overnight in the refrigerator and reheat in a 375°F (190°C) oven for about 10-15 minutes until warmed through.
What if my crust is too crumbly?
If your crust seems too crumbly and doesn’t hold together well, it might need a little more moisture. Add ice water one tablespoon at a time while mixing until the dough comes together but isn’t sticky. Remember to handle the dough gently; overworking it can lead to a tougher texture.
How can I make this recipe gluten-free?
For a gluten-free version of this apple tart, substitute the all-purpose flour with a 1-to-1 gluten-free baking flour blend that includes xanthan gum. This will help achieve that flaky crust without compromising on texture or flavor!
What’s the serving size for this recipe?
This delicious apple tart serves about four people, making it perfect for a cozy family dessert or small gathering. Each serving contains approximately 250 calories—just enough to indulge without overdoing it!
Apple Tart
Ingredients
Method
- In a mixing bowl, combine flour, butter, sugar, and salt. Mix until crumbly.
- Add ice water gradually until the dough comes together. Form into a disk and refrigerate for 30 minutes.
- In another bowl, toss sliced apples with brown sugar, cinnamon, and lemon juice.
- Preheat the oven to 375°F (190°C). Roll out the dough and fit it into a pie dish.
- Fill the crust with the apple mixture and bake for 45 minutes or until the apples are tender.
Leave a Comment