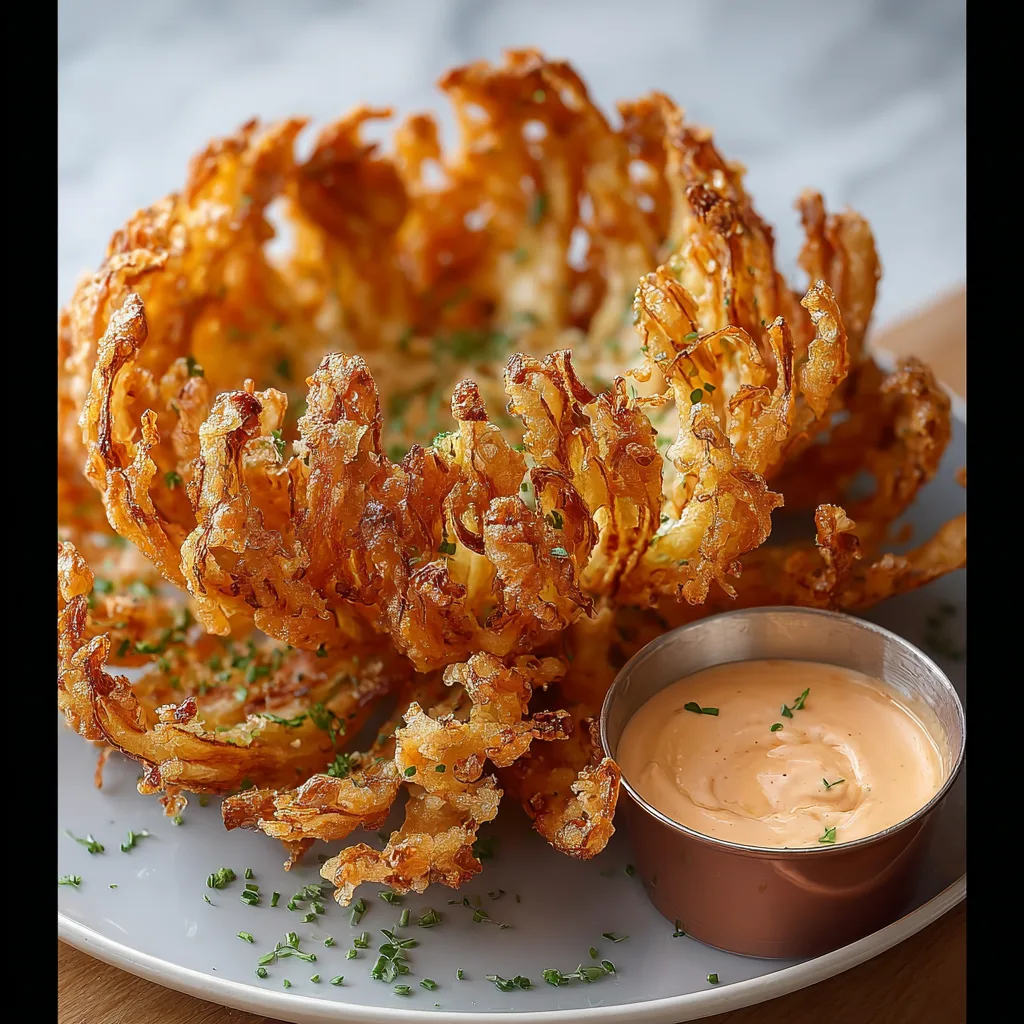
Imagine sinking your teeth into a Crispy Blooming Onion, where each delicate petal unveils a symphony of crunch and flavor, tantalizing your taste buds with its savory, zesty notes. The aroma wafts through the air, inviting friends and family to gather around, eager to share this delectable appetizer that instantly transforms any gathering into a festive occasion.
Growing up, the blooming onion was the star of every backyard barbecue and family get-together, where laughter mingled with the mouthwatering scent of golden-fried perfection. Whether it’s game day or a cozy night in, this dish promises not just a snack but an experience filled with crispy joy that leaves you craving more after every bite.
Why Is Crispy Blooming Onion So Irresistibly Good?
Crispy texture: Each bite delivers an addictively crunchy exterior that perfectly contrasts the tender onion inside.
Bold flavors: The seasoned batter, featuring paprika and garlic powder, elevates the taste to new heights, making it hard to resist.
Quick prep: With just 20 minutes of prep and 10 minutes of cooking, you can whip up this delightful appetizer in no time!
Crowd-pleaser: Perfect for parties or game day, it’s sure to impress friends and family alike.
Versatile snacking: Enjoy it as a standalone treat or pair it with your favorite dipping sauce for a flavorful punch!
Crispy Blooming Onion Ingredients
For the Onion
- 1 large onion (preferably a sweet onion) – A sweet onion adds a delightful flavor contrast to the crispy coating, making it an irresistible treat.
For the Batter
- 1 cup all-purpose flour – This forms the base of your batter, providing that all-important crunch when fried.
- 1 cup buttermilk – Buttermilk keeps the onion tender and moist while also adding a tangy flavor.
- 1 tablespoon paprika – Paprika gives your batter a beautiful color and a hint of smokiness that enhances the overall taste.
- 1 teaspoon garlic powder – Garlic powder brings an extra layer of flavor, making each bite of your Crispy Blooming Onion even more savory.
- 1 teaspoon onion powder – This intensifies the onion flavor, complementing the sweetness of the fresh onion.
- 1 teaspoon salt – Salt balances flavors and enhances the deliciousness of your blooming onion.
- 1 teaspoon black pepper – Black pepper adds just the right amount of heat and depth to your batter.
For the Oil
- 2 cups vegetable oil (for frying) – Choose a neutral oil with a high smoke point for frying, ensuring your blooming onion comes out crispy and golden without burning.
Directions: Crispy Blooming Onion
1. Prepare the Onion: Cut the top off the onion and peel it. Make deep cuts in a star pattern down to the base, being careful not to cut through, so it blooms beautifully.
2. Make the Batter: In a mixing bowl, combine 1 cup of all-purpose flour, 1 cup of buttermilk, 1 tablespoon of paprika, 1 teaspoon of garlic powder, 1 teaspoon of onion powder, 1 teaspoon of salt, and 1 teaspoon of black pepper. This flavorful mixture will give your onion that crispy coating.
3. Coat the Onion: Dip the prepared onion into the batter, ensuring it is well coated. This step is crucial for achieving that delightful crunch when fried.
4. Fry the Onion: Heat 2 cups of vegetable oil in a deep fryer to about 350°F (175°C). Carefully lower the coated onion into the hot oil and fry until golden brown, about 10 minutes. Watch it transform into a crispy masterpiece!
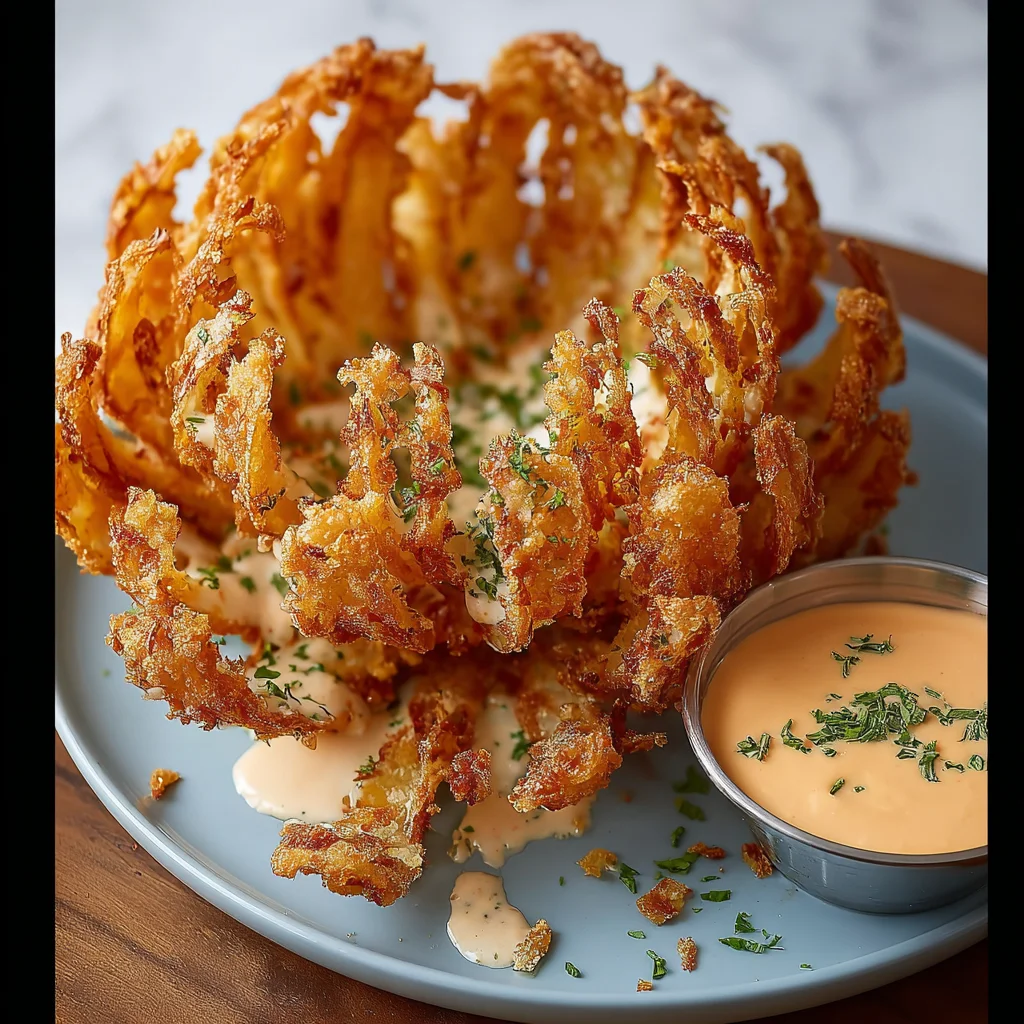
5. Serve: Remove the onion from the oil and drain on paper towels. Serve hot with your favorite dipping sauce for an irresistible treat.
Optional: For added flavor, sprinkle with fresh herbs before serving.
Exact quantities are listed in the recipe card below.
Expert Tips
- Choose the Right Onion: Use a large sweet onion for the best flavor and structure; it helps create that signature blooming effect.
- Deep Cuts Matter: Make sure your cuts are deep enough to open up the petals, but don’t cut through the bottom; this keeps the onion intact while frying.
- Batter Consistency: Ensure your batter is smooth and well combined. Lumps can lead to uneven coating, affecting your crispy blooming onion’s texture.
- Frying Temperature: Maintain oil at 350°F (175°C) for optimal frying; too hot can burn the outside while leaving the inside undercooked.
- Drain Properly: After frying, let your crispy blooming onion drain on paper towels to absorb excess oil, keeping it light and crispy.
How to Store and Freeze Crispy Blooming Onion
- Room Temperature: Enjoy your crispy blooming onion immediately for the best texture; it’s best consumed fresh and hot.
- Fridge: If you have leftovers, store them in an airtight container in the fridge for up to 3 days. Reheat in an oven to regain crispiness.
- Freezer: For longer storage, freeze the unbattered onion before frying. Wrap tightly in plastic wrap and store in a freezer-safe bag for up to 1 month.
- Reheating: To bring back that delightful crunch, reheat your crispy blooming onion in a preheated oven at 350°F (175°C) for about 10-15 minutes.
Crispy Blooming Onion Your Way
Feel free to get creative with this delightful dish and make it truly your own!
- Gluten-Free: Substitute all-purpose flour with a gluten-free flour blend. This swap will ensure everyone can enjoy the crispy goodness without worry. The texture may differ slightly, but the flavor remains irresistible.
- Spicy Kick: Add 1 teaspoon of cayenne pepper to your batter for a fiery twist. If you love heat, this variation will elevate the dish with bold flavors that dance on your palate. It’s perfect for those who crave an extra layer of excitement!
- Herbed Delight: Mix in 1 tablespoon of dried herbs like oregano or thyme into the flour for a fragrant touch. This little addition enhances the savory notes and adds freshness, making each bite feel like a garden party.
- Zesty Citrus: Squeeze in some lemon juice or add lemon zest to the buttermilk for bright acidity. This citrusy boost cuts through the richness, balancing each mouthful and making it a refreshing treat.
- Cheesy Goodness: Stir in ½ cup of grated Parmesan cheese into your batter for cheesy flavor. The melting cheese creates an even more indulgent experience, bringing comfort food vibes to every crunch.
- Sweet Onion Bliss: Use Vidalia or Walla Walla onions instead of regular sweet onions for an even sweeter profile. These varieties bring out the natural sweetness, enhancing the overall flavor while keeping the classic crispy texture intact.
- Smoky Flavor: Incorporate smoked paprika in place of regular paprika for a deeper, smoky taste. This minor adjustment introduces a new dimension, adding warmth that complements the onion perfectly.
- Baking Option: Try baking instead of frying by placing your battered onion in a preheated oven at 400°F (200°C) for about 25 minutes. While it won’t have quite the same crunch as frying, it offers a healthier alternative that still satisfies those cravings!
Make Ahead Options
If you’re looking to enjoy a delightful Crispy Blooming Onion without the last-minute rush, this recipe is perfect for meal prep! You can prepare the onion and batter in advance. Start by cutting the top off your large sweet onion and peeling it, then make those deep cuts in a star pattern down to the base; this can be done up to 24 hours ahead. For the batter, mix together 1 cup of all-purpose flour, 1 cup of buttermilk, 1 tablespoon of paprika, 1 teaspoon each of garlic powder, onion powder, salt, and black pepper, and store it in the fridge for up to 3 days. When you’re ready to serve, simply dip the prepared onion into the chilled batter, heat your vegetable oil in a deep fryer, and fry until golden brown—about 10 minutes. This way, you save time while still delivering an irresistible Crispy Blooming Onion that everyone will love!
Crispy Blooming Onion Recipe FAQs
What type of onion is best for making a crispy blooming onion?
For the best results, choose a large sweet onion, like a Vidalia or Walla Walla. These onions have a milder flavor and a great texture that holds up well during frying, making them perfect for creating that deliciously crispy exterior!
Can I substitute buttermilk in the batter?
Absolutely! If you don’t have buttermilk on hand, you can create a quick substitute by mixing 1 cup of milk with 1 tablespoon of vinegar or lemon juice. Let it sit for about 5 minutes before using it in your batter. This will give you the acidity needed to tenderize the batter and add flavor.
How should I store leftovers?
If you happen to have any leftover crispy blooming onion (though it’s hard to resist!), store it in an airtight container in the refrigerator for up to 2 days. To reheat, place it in an oven at 350°F (175°C) for about 10 minutes to help restore some of its crispiness.
Can I freeze the blooming onion after frying?
While it’s best enjoyed fresh, you can freeze fried blooming onion pieces. Simply let them cool completely and then wrap them tightly in plastic wrap or aluminum foil before placing them in a freezer-safe bag. They’ll keep well for up to 2 months! When ready to eat, just pop them back in the oven at 350°F (175°C) until heated through.
What dipping sauces pair well with a crispy blooming onion?
There are so many delicious options! Classic choices include ranch dressing or spicy mayo, but feel free to get creative! A tangy honey mustard or zesty garlic aioli can elevate your blooming onion experience even more. Serve alongside your favorites and watch them disappear!
I’m worried about frying; what should I watch out for?
Frying can be intimidating, but don’t worry! Make sure your vegetable oil is hot enough (around 350°F or 175°C) before adding the onion; this ensures that it cooks evenly and becomes golden brown in about 10 minutes. Keep an eye on the color as it fries—once it’s perfectly golden, carefully remove it from the oil using tongs!
Crispy Blooming Onion
Ingredients
Method
- Cut the top off the onion and peel it. Make deep cuts in a star pattern down to the base, being careful not to cut through.
- In a mixing bowl, combine flour, buttermilk, paprika, garlic powder, onion powder, salt, and black pepper.
- Dip the prepared onion into the batter, ensuring it is well coated.
- Heat the vegetable oil in a deep fryer. Carefully lower the coated onion into the hot oil and fry until golden brown, about 10 minutes.
- Remove the onion from the oil and drain on paper towels. Serve hot with your favorite dipping sauce.
Leave a Comment