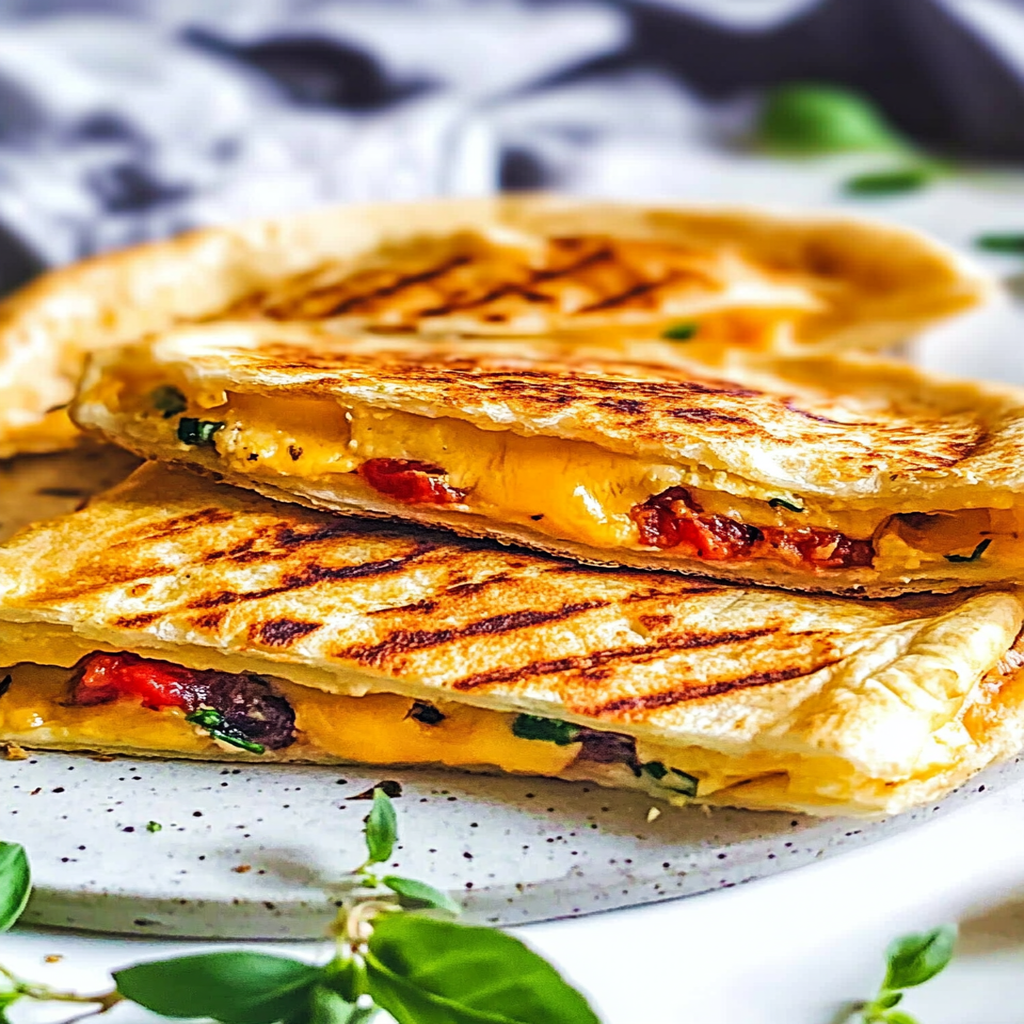
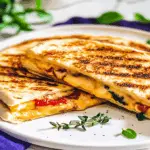
There’s something magical about the way gooey cheese melds with crispy bread, creating an experience that makes your taste buds dance. The Grilled Cheese Pita is not just a meal; it’s a warm hug on a plate, perfect for those chilly evenings when you need comfort food that feels like home.
Picture this: it’s a rainy day, your favorite blanket is wrapped around you, and the aroma of melting cheese fills the air. That’s the essence of this dish. Whether it’s a quick lunch or a late-night snack, the Grilled Cheese Pita brings joy to every bite. Let’s dive into this delicious adventure and see why you’ll want to make it again and again.
Why You'll Love This Recipe
- This Grilled Cheese Pita is incredibly easy to whip up, making it perfect for any skill level.
- The combination of flavors creates a mouthwatering explosion that’s hard to resist.
- Its golden crust and melty interior are simply irresistible.
- Plus, it’s versatile enough to satisfy any craving—add veggies or meats to customize it just for you!
Ingredients for Grilled Cheese Pita
Here’s what you’ll need to make this delicious dish:
- Pita Bread: Opt for fresh pita for the best texture; whole wheat adds extra flavor.
- Cheese: Choose your favorites like cheddar or mozzarella for that ooey-gooey goodness.
- Butter: Use unsalted butter for spreading on the outside of the pita for a crispy finish.
- Optional Fillings: Add sliced tomatoes, spinach, or even turkey for added flavor and nutrition.
How to Make Grilled Cheese Pita
Follow these simple steps to prepare this delicious dish:
Step 1: Prepare Your Ingredients
Gather all your ingredients and make sure your cheese is shredded or sliced for quicker melting. Don’t forget to set out your butter; it needs to be at room temperature!
Step 2: Heat Up Your Pan
Preheat a skillet over medium heat. If you have a non-stick pan, that’s even better—no one likes burnt cheese sticking everywhere.
Step 3: Assemble Your Pita
Spread butter on one side of each pita. On the unbuttered side, layer your cheese generously and add any optional fillings like veggies or meats if desired.
Step 4: Cook Until Golden
Place the pita in the heated skillet, buttered side down. Cook until golden brown (about 3-4 minutes). Flip it carefully and let the other side get nice and crispy while keeping an eye on that melty cheese.
Step 5: Melt It All Together
Covering the pan with a lid can help trap steam and ensure that cheese melts perfectly without burning the bread.
Step 6: Slice and Serve
Once both sides are golden brown and the cheese is oozing out (a sight worth celebrating), remove from heat. Slice into wedges and serve hot—optionally with some dipping sauce like marinara or ranch!
Transfer to plates and enjoy every cheesy bite of this scrumptious Grilled Cheese Pita!
You Must Know
- This delightful grilled cheese pita not only satisfies your cravings for gooey, melty goodness but is also a playful twist on a classic.
- The crispy exterior and cheesy interior create a satisfying crunch that will have everyone coming back for seconds.
- Perfect for lunch or a late-night snack!
Perfecting the Cooking Process
Start by heating a skillet over medium heat and preparing your pita pockets. While the pan warms up, get your cheese ready. Sear the pitas until they’re golden brown, then stuff them with cheese and grill until gooey perfection.
Add Your Touch
Feel free to switch up the cheese selection! Try adding pepper jack for a spicy kick or feta for a Mediterranean twist. Mediterranean stuffed eggplant You can also toss in some sautéed veggies like spinach or mushrooms to elevate your grilled cheese pita.
Storing & Reheating
Store any leftovers in an airtight container in the fridge for up to three days. To reheat, pop them in a skillet over low heat until warmed through, which helps maintain their crunchy texture.
Chef's Helpful Tips
- Use fresh, high-quality cheeses for maximum flavor and meltability.
- Don’t rush the grilling process; slow and steady wins this cheesy race.
- Pairing with a dipping sauce can elevate your grilled cheese experience even further!
Sometimes when I whip up these grilled cheese pitas, friends ask for seconds before they’ve even finished their first! Their enthusiasm makes every bite worth it and always brings laughter to our gatherings.
FAQs :
What is a Grilled Cheese Pita?
A Grilled Cheese Pita is a delicious twist on the classic grilled cheese sandwich. Instead of using traditional bread, this recipe utilizes pita bread to create a unique and flavorful dish. The combination of melted cheese, fresh ingredients, and the crispy outer layer of the pita makes it a favorite for many. Asian charcuterie board You can customize it by adding vegetables or different types of cheese, making it versatile for various tastes and preferences.
How do you make the perfect Grilled Cheese Pita?
To make the perfect Grilled Cheese Pita, start by heating a skillet over medium heat. Take your pita and fill it with your choice of cheese—cheddar, mozzarella, or gouda work well. Close the pita and place it in the skillet. matcha blondies for dessert Cook until golden brown on one side before flipping to achieve a perfectly crispy exterior. The key is to keep the heat moderate so that the cheese melts thoroughly without burning the pita.
Can you add other ingredients to Grilled Cheese Pita?
Absolutely! You can enhance your Grilled Cheese Pita by adding various ingredients. Consider including fresh spinach, tomatoes, or even grilled chicken for extra flavor and nutrition. Some people love adding herbs like basil or oregano to elevate the taste further. Be creative with your fillings; this dish adapts well to personal preferences!
Is Grilled Cheese Pita suitable for vegetarians?
Yes, Grilled Cheese Pita is vegetarian-friendly! It primarily consists of pita bread and cheese, both of which are suitable for those following a vegetarian diet. You can also incorporate vegetables or plant-based cheeses for additional options while keeping it vegetarian. This dish offers flexibility that caters to various dietary needs.
Conclusion for Grilled Cheese Pita :
In summary, the Grilled Cheese Pita combines simplicity with delicious flavors, making it a go-to option for quick meals or snacks. With its versatile nature, you can customize it according to your taste preferences by adding various ingredients like vegetables or different types of cheese. This recipe not only provides comfort food but also encourages creativity in the kitchen. Enjoy making this delightful dish that’s sure to please everyone at your table!
Grilled Cheese Pita
Grilled Cheese Pita is a delightful twist on a classic comfort food. This recipe combines warm, gooey cheese with crispy pita bread, making it perfect for a quick lunch or a late-night snack. In just minutes, you can customize your pita with your favorite cheeses and add-ins like vegetables or meats, creating a satisfying dish that brings warmth and joy to any occasion.
- Prep Time: 10 minutes
- Cook Time: 8 minutes
- Total Time: 18 minutes
- Yield: 2 servings 1x
- Category: Comfort Food
- Method: Frying
- Cuisine: American
Ingredients
- 2 whole wheat pita breads
- 1 cup shredded cheddar cheese
- 2 tablespoons unsalted butter (room temperature)
- ½ cup sliced tomatoes
- ½ cup fresh spinach
- ¼ cup turkey slices
Instructions
- Preheat a skillet over medium heat.
- Spread butter on one side of each pita.
- On the unbuttered side, layer cheese generously and add any optional fillings.
- Place the pita in the skillet, buttered side down. Cook until golden brown (3-4 minutes), then flip and cook until crispy.
- Cover with a lid to ensure cheese melts thoroughly.
- Slice into wedges and serve hot with your favorite dipping sauce.
Nutrition
- Serving Size: 1 Grilled Cheese Pita (150g)
- Calories: 310
- Sugar: 3g
- Sodium: 550mg
- Fat: 18g
- Saturated Fat: 10g
- Unsaturated Fat: 6g
- Trans Fat: 0g
- Carbohydrates: 29g
- Fiber: 5g
- Protein: 12g
- Cholesterol: 40mg
Leave a Comment