The moment you bite into a DIY Uncrustable Sandwich, it’s like a joyful explosion of nostalgia. You know that feeling when you were a kid, and lunch was an adventure packed between two slices of bread? Imagine taking that childhood delight and transforming it into an easy-to-make meal, perfect for busy days or lazy afternoons. These sandwiches are not just about convenience; they’re a delightful canvas for flavors that dance on your palate.
Now picture this: the sun is shining, and your kids are bouncing around the house like they’ve had too much sugar. You want to keep them happy without spending hours in the kitchen, right? Enter the DIY Uncrustable Sandwiches, which are not only fun to make but also customizable to suit everyone’s taste buds. Whether it’s classic peanut butter and jelly or a more adventurous combo, these little delights promise to tickle your taste buds and bring back fond memories.
Why You'll Love This Recipe
- These sandwiches are incredibly easy to prepare; even the kids can join in on the fun.
- They offer endless flavor combinations, ensuring everyone gets their favorite.
- These uncrustables look adorable and are perfect for lunchboxes or picnics.
- Plus, they’re great for any occasion—school lunches, road trips, or snack time at home.
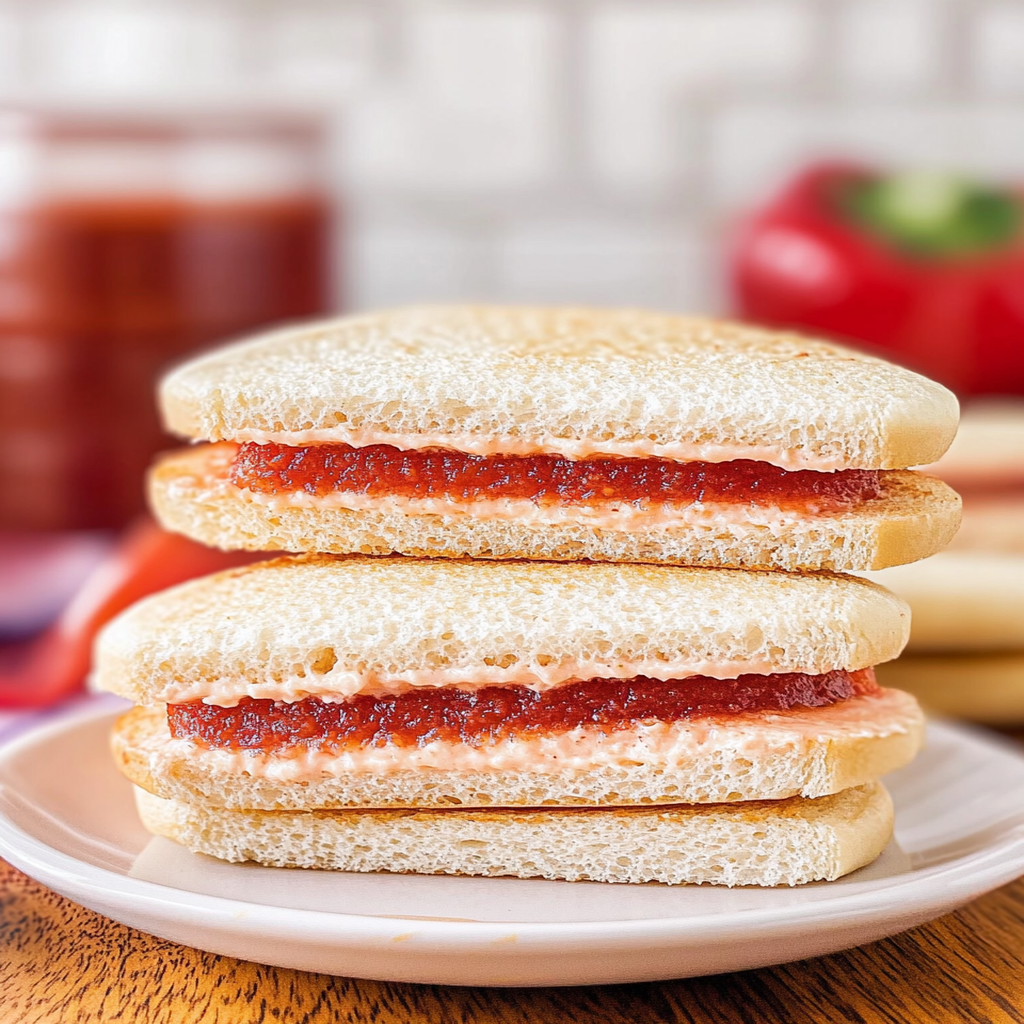
Ingredients for DIY Uncrustable Sandwiches
Here’s what you’ll need to make this delicious dish:
- Bread: Use soft white or whole wheat bread for the best results; avoid crusty loaves that won’t seal well.
- Peanut Butter: Creamy or crunchy—your choice! Just make sure it’s spreadable for easy assembly.
- Jelly or Jam: Choose your favorite flavor (grape, strawberry, raspberry) to create that sweet filling.
- Honey (optional): A drizzle of honey adds extra sweetness and pairs beautifully with nut butter.
- Nutella (optional): For those who prefer chocolatey goodness over jelly—because why not?
How to Make DIY Uncrustable Sandwiches
Follow these simple steps to prepare this delicious dish:
Step 1: Gather Your Ingredients
Start by laying out all your ingredients on a clean surface. This ensures you won’t have to search for anything mid-assembly!
Step 2: Spread the Peanut Butter
Take two slices of bread and generously spread peanut butter on one side of each slice. Don’t be shy here; we want a thick layer!
Step 3: Add Your Jelly
On top of the peanut butter slice, spread your chosen jelly or jam evenly. If you’re feeling adventurous, add honey or Nutella for an extra twist of flavor.
Step 4: Assemble the Sandwich
Place the second slice of bread on top of the first so that the peanut butter and jelly sides are facing each other. Press down gently to help them stick together.
Step 5: Seal the Edges
Using a sandwich cutter or a round cookie cutter, press down firmly around the edges to seal your sandwich tightly. If you don’t have one handy, use a fork to crimp around the edges instead.
Step 6: Cut and Serve
Once sealed, cut your sandwich in half (or leave it whole if you prefer) and serve immediately. These sandwiches taste best fresh but can also be stored in an airtight container in the fridge for later enjoyment.
Transfer to plates and enjoy these delightful little pockets filled with love—and maybe even some crumbs from your kids’ excited munching!
With these DIY Uncrustable Sandwiches in hand, you’ll have lunch covered without breaking a sweat while also igniting some joyful nostalgia along the way!
You Must Know
- DIY Uncrustable Sandwiches are not just a fun way to enjoy lunch; they save time and reduce waste.
- Customize them with your favorite fillings, making lunchtime exciting again.
- Plus, who doesn’t love a sandwich that’s perfect for little hands or on-the-go snacking?
Perfecting the Cooking Process
Start by gathering all your ingredients and tools. Use a sandwich cutter to shape the bread perfectly. Spread your filling evenly before sealing the edges, ensuring every bite is delicious. Finally, freeze them for a quick meal later.
Add Your Touch
Feel free to swap out traditional peanut butter and jelly for Nutella and banana or cream cheese with cucumber. Spice things up with flavored spreads or add-ins like sliced apples or marshmallow fluff. Your imagination is the limit!
Storing & Reheating
Store your DIY Uncrustable Sandwiches in an airtight container or freezer bags to keep them fresh. They can be frozen for up to three months. Simply thaw at room temperature or pop them in the fridge for a few hours before serving.
Chef's Helpful Tips
- For perfect DIY Uncrustable Sandwiches, use soft bread for easy sealing and best texture.
- Always ensure your fillings aren’t too wet to prevent sogginess.
- Experiment with various shapes using different cutters for fun presentation!
My kids went wild when I first made these sandwiches. They couldn’t believe I had made their favorite snack even better! It turned into a family lunch tradition, filled with giggles and creativity in the kitchen.
FAQs:
What are DIY Uncrustable Sandwiches?
DIY Uncrustable Sandwiches are homemade versions of the popular pre-made sandwiches that eliminate the crusts. They typically consist of two slices of bread filled with various spreads or fillings, such as peanut butter and jelly. Making these sandwiches at home allows you to customize flavors and ingredients according to your preferences and dietary needs.
How do I make DIY Uncrustable Sandwiches?
To make DIY Uncrustable Sandwiches, gather your ingredients, including bread and your chosen fillings. Use a round cutter or the rim of a glass to cut out the bread into circles. Spread your desired filling on one piece and top it with another circle of bread. sushi sandwich recipe Press the edges together to seal, and you have a delicious sandwich ready for packing or freezing.
Can I freeze DIY Uncrustable Sandwiches?
Yes, you can freeze DIY Uncrustable Sandwiches! After assembling them, wrap each sandwich tightly in plastic wrap or foil. Place them in an airtight container or freezer bag to prevent freezer burn. DIY snack box ideas They can be stored in the freezer for up to two months, making them a convenient option for quick meals or snacks.
What fillings can I use for my DIY Uncrustable Sandwiches?
You can use a variety of fillings for your DIY Uncrustable Sandwiches. Popular options include classic peanut butter and jelly, Nutella with banana slices, cream cheese with fruit preserves, or even savory options like hummus with sliced veggies. The possibilities are endless, so feel free to get creative based on your taste preferences!
Conclusion for DIY Uncrustable Sandwiches:
In summary, DIY Uncrustable Sandwiches offer a fun and customizable way to enjoy this classic treat without the crusts. You can easily prepare them at home using simple ingredients and various fillings tailored to your taste. Freezing these sandwiches makes them an excellent option for busy days when you need a quick snack or lunch. Enjoy making and sharing these delightful sandwiches with family and friends!
DIY Uncrustable Sandwiches

DIY Uncrustable Sandwiches make lunchtime a delightful adventure! Perfect for busy days, these easy-to-make sandwiches are fully customizable, allowing you to keep the crusts away while enjoying endless flavor combinations. Whether you prefer classic peanut butter and jelly or want to get creative with fillings, these little pockets of joy are sure to please kids and adults alike. Enjoy them fresh or freeze for quick snacks later—lunch has never been this fun!
- Prep Time: 10 minutes
- Cook Time: 0 minutes
- Total Time: 10 minutes
- Yield: Makes 1 serving 1x
- Category: Snack
- Method: No cook
- Cuisine: American
Ingredients
- 2 slices soft white or whole wheat bread
- 2 tablespoons creamy peanut butter
- 2 tablespoons jelly or jam (your choice of flavor)
- 1 teaspoon honey (optional)
- 1 tablespoon Nutella (optional)
Instructions
- Gather all ingredients on a clean surface.
- Spread peanut butter generously on one side of each slice of bread.
- On one slice, add jelly or jam evenly; drizzle honey or Nutella if desired.
- Place the second slice of bread on top, peanut butter side facing jelly side, and press gently.
- Seal edges using a sandwich cutter or fork to prevent filling from escaping.
- Cut the sandwich in half and serve immediately, or store in an airtight container for later.
Nutrition
- Serving Size: 1 sandwich
- Calories: 300
- Sugar: 12g
- Sodium: 230mg
- Fat: 14g
- Saturated Fat: 3g
- Unsaturated Fat: 9g
- Trans Fat: 0g
- Carbohydrates: 36g
- Fiber: 2g
- Protein: 10g
- Cholesterol: 0mg
Leave a Comment